See how it works
A real walk-through of SiteNorma with a demonstration website: you analyse, understand an issue, apply the fix and check the result. No sign-up, and with the platform’s own screens.
The demonstration website
Example scan in SiteNorma
- Demonstration website
- Zapatillas Norte (fictitious)
- Date of the scan
Captures of the real SiteNorma dashboard with a demonstration website created for this example. The website’s data are illustrative and do not come from any customer.
-
Analyse your website
See the issues found and locate the pages they affect.
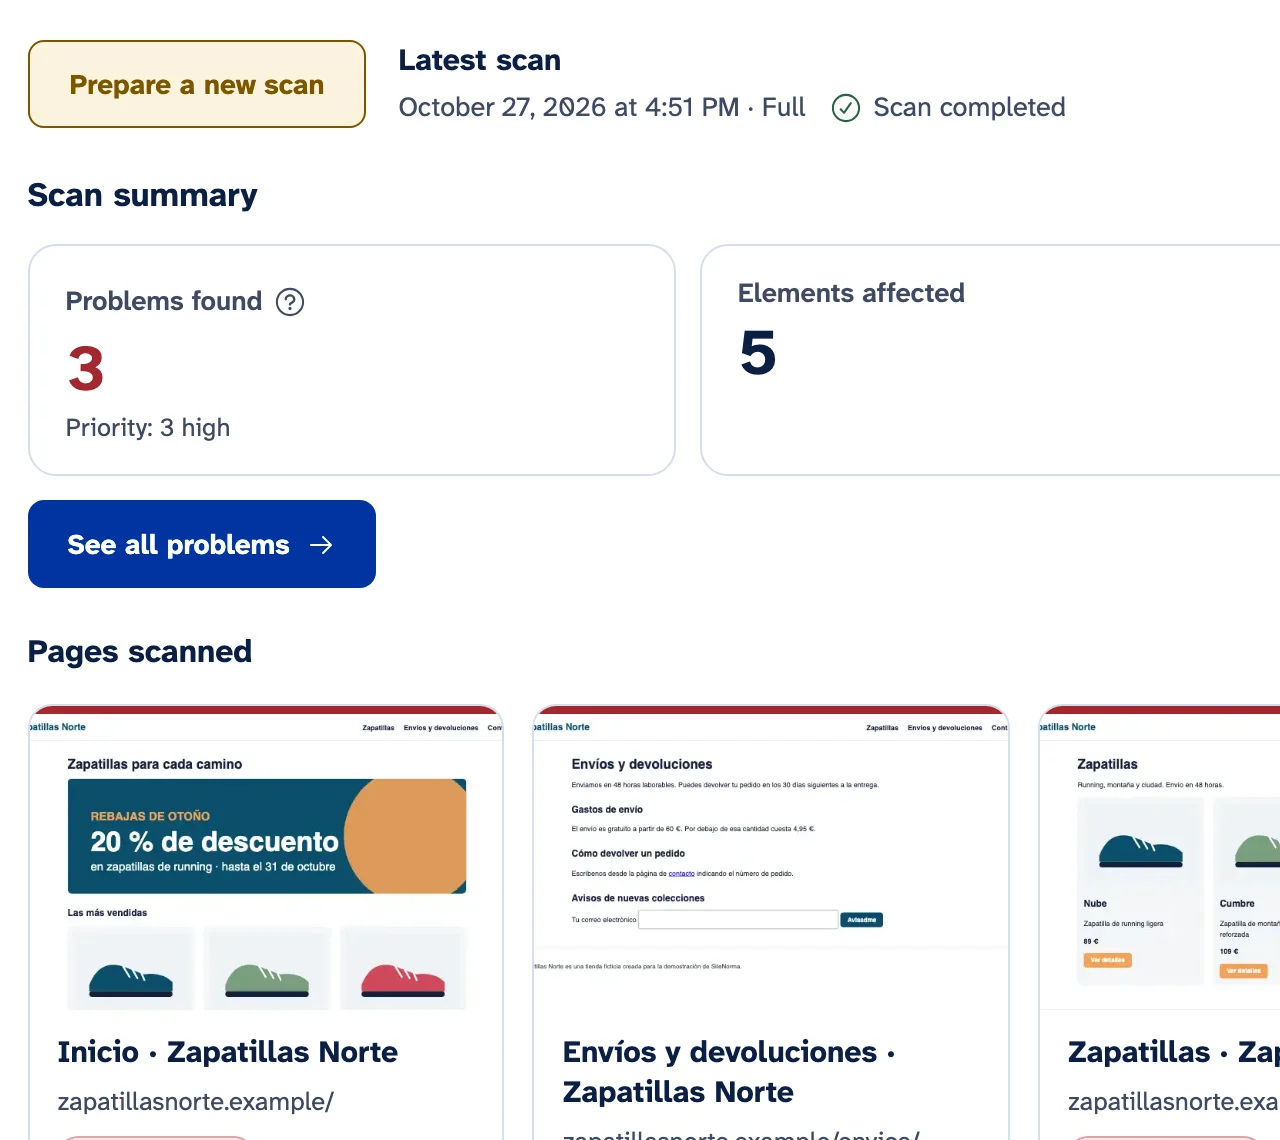
SiteNorma analyses the pages of the website on desktop and on mobile. In this example it goes through 4 pages and finds 3 accessibility problems spread over 3 of them: the home page, the shipping page and the shoes page. Each page appears with its screenshot and its number of problems.
Overview: the scan summary and the pages scanned. Enlarge screenshot (Overview, Analyse your website) Detail: the scan figures and the first pages, each with its number of problems. Enlarge screenshot (Detail, Analyse your website) -
Prioritise and fix
Understand what to review first and see a proposed solution to apply on your website.
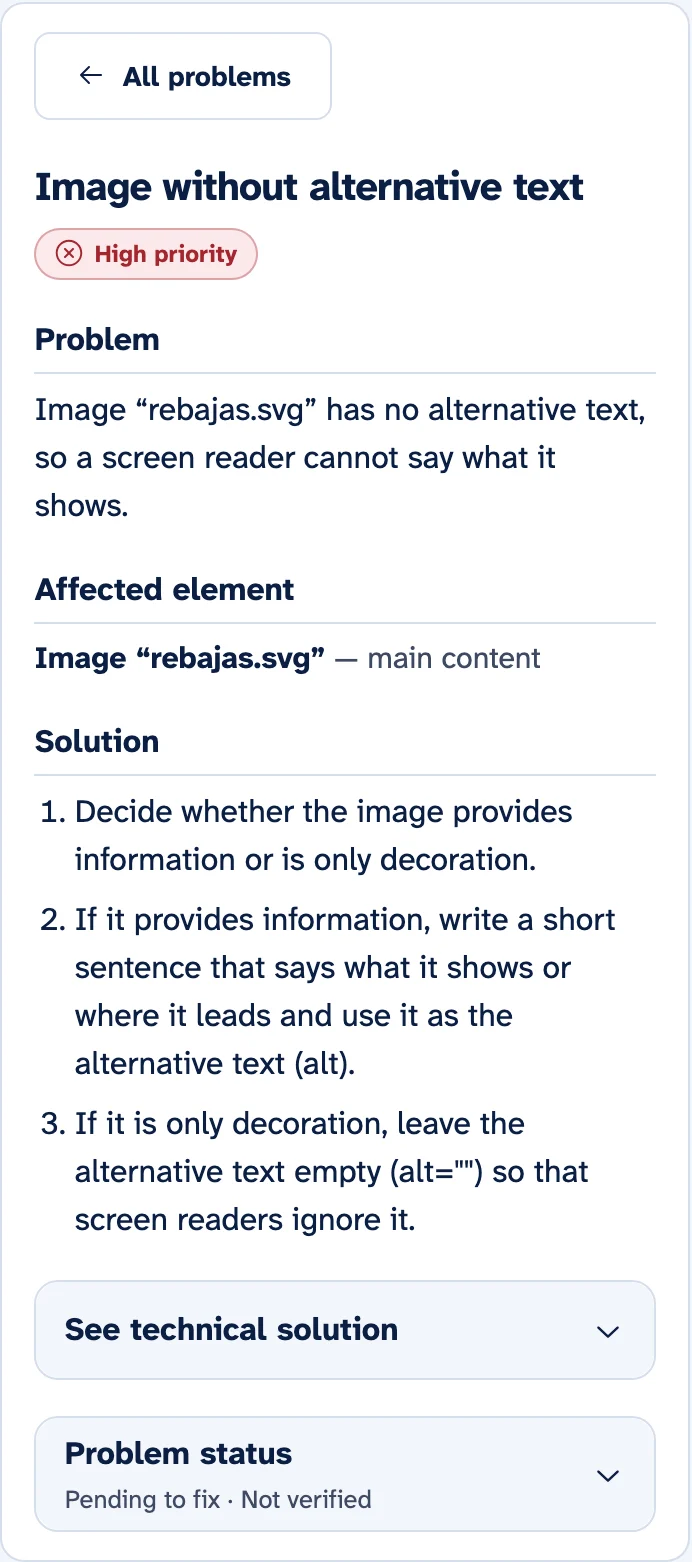
The three problems in the example have high priority; the dashboard orders the list by priority and by how many elements and pages they affect. Here we follow a single issue: the sale banner on the home page is an image that carries information (the discount) and has no alternative text, so a screen reader cannot say what it shows. SiteNorma marks it on the page screenshot and proposes the steps to fix it.
SiteNorma does not change your website. The proposal is a guide: you or your team apply the change on the website and then run the analysis again.
Overview: the affected element marked on the page screenshot, with the solution beside it. Enlarge screenshot (Overview, Prioritise and fix) Detail: the problem, the affected element and the steps of the solution. Enlarge screenshot (Detail, Prioritise and fix) Before (the image has no alternative text) <img class="banner" src="/img/rebajas.svg" width="1040" height="300">After (with the proposal applied) <img class="banner" src="/img/rebajas.svg" width="1040" height="300" alt="Rebajas de otoño: 20 % de descuento en zapatillas de running hasta el 31 de octubre">An example of the proposal, applied on the demonstration website. The alternative text describes the information the banner provides.
-
Review and check
Check the fix and run the analysis again to see whether the issue still appears.
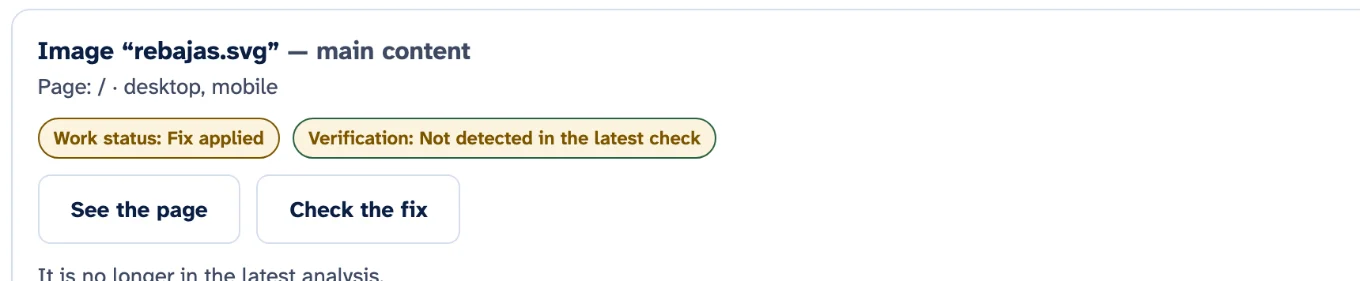
The team adds the alternative text on the website and marks the fix as applied: that does not make it resolved yet. Then it asks for a check of that page. If the analysis no longer detects the image without alternative text, the follow-up shows it as “Not detected in the latest check”.
What it means and what it does not. The check reviewed only the page that was fixed: the other two problems in the example (low-contrast text and a field without a label) are still pending. And an issue that is no longer detected does not mean the website is fully accessible: the automated check must be complemented by a manual review.
Overview: the follow-up of the fix, after the check. Enlarge screenshot (Overview, Review and check) Detail: the work status and the result of the check. Enlarge screenshot (Detail, Review and check)



Limits of this demonstration
- It is an example with a fictitious website: it is not the analysis of your website or an assessment of your situation.
- Automated analysis identifies part of the accessibility barriers. The automated check must be complemented by a manual review.
- An issue that is no longer detected does not mean the website is fully accessible: only that this check no longer finds it.
This is a demonstration, not your analysis
If you enter your website’s address in the form, a separate analysis starts, independent of this example and its data.